Software updates are crucial to protect your computer and to enhance the user experience. However, there are times when disabling updates makes sense. By default, windows 10 automatically downloads and installs new updates without your permission.
While this is a handy feature for some users, others may find it annoying. Keep in mind that disabling Windows 10 updates may render your computer vulnerable to viruses or malware attacks. However, if you are fed up with Windows 10 updates, here is how to stop this behavior.
Windows 10 Pro includes Local Group Policy editor, a handy tool that allows you to enable and disable certain features without having to modify the Registry. In this case, this is an easy way to disable Windows 10 updates on your computer.
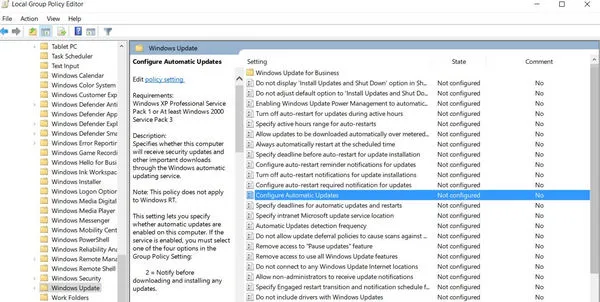
Step 1: Click on Start from your taskbar, then enter gpedit.msc into the input field, and click on the top result to launch the Local Group Policy editor.
Step 2: Navigate to the following path: Computer Configuration > Administrative Templates > Windows Components >Windows Update and double-click Configure Automatic Updates from the right side bar.
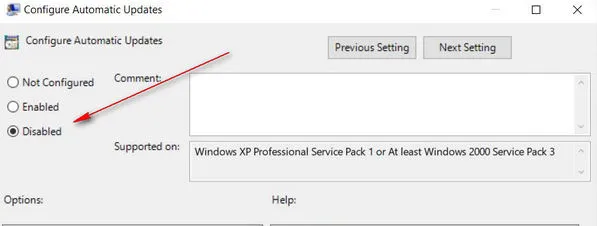
Step 3: Now just tick the box next to Disabled option and hit the Apply button.
Note: Once automatic updates are disabled, you still can download and install new Windows 10 updates manually. To do this, open Settings > Updates & Security > Windows Updates and check for new updates.
Editing Registry is a risky move and a wrong turn may result in file corruption or system failure, so make sure you follow our guide carefully in below.
Step 1: Open Start on your computer, then search for regedit and launch it.
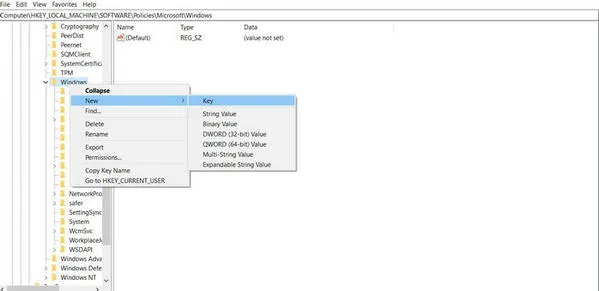
Step 2 :Navigate to the following path: HKEY_LOCAL_MACHINE > SOFTWARE > Policies > Microsoft > Windows.
Step 3: Right-click the Windows folder, select New from the drop-down menu and click on Key.
Step 4: Name the new key Windows Update and hit Enter. After that, right-click the newly-created key > New > Key.
Step 5: Add a new key AU, then right-click on the right side > New > DWORD (32-bit) Value.
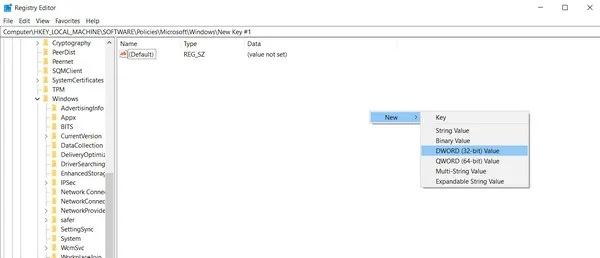
Step 6: Name the new key No AutoUpdate and hit Enter. After that, double-click the new key and insert 1 into the value data section. Click OK and restart your computer.
You can quickly disable Windows 10 updates in the Windows Update Service. Following this method, your Windows will stop automatic updates, and programs will not be able to perform new software updates.
Step 1: Open the Run box on your computer by pressing the Windows logo key + R at the same time, then type services.msc, and hit Enter.
Step 2: Locate Windows Update and double-click it. After that, select Disabled and hit Apply.
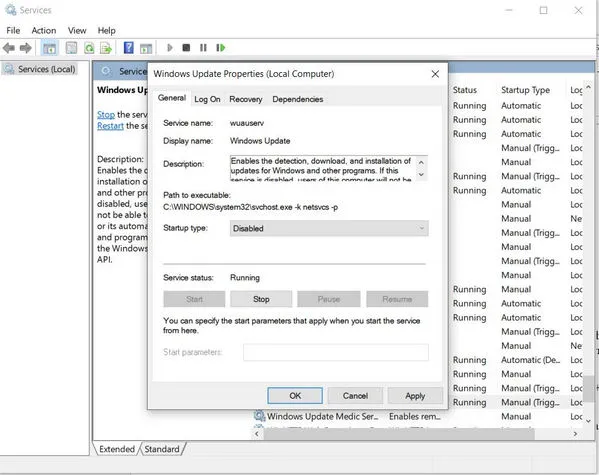
Step 3: If this is the first time you disable Windows Updates, you are not done yet. Select the Recovery tab, then select Take No Action in the First Failure Section, click Apply, and restart your computer.
A lot of users have reported that their Windows still performs updates when they have turned off Windows Update in the Windows Update Service. This is mainly caused by Windows 10 Update Assistant. In this case, it's a good idea to uninstall Windows 10 Update Assistant.
Step 1: O pen the Run window on your computer, then enter appwiz.cpl into the input field and click OK.
Step 2: Locate Windows 10 Update Assistant, then right-click on it, and select Uninstall.

Step 3: Open File Explorer, then click This PC and navigate to the following path: This PC > C drive > Windows > Windows10Upgrade and remove the Windows 10Upgrade folder.
Step 4: If you cannot find Windows10Upgrade folder, then head over to This PC > Windows, and delete UpdateAssistantV2 and UpdateAssistant.
Step 5: Restart your computer.
 Posted by Alex Ben
 Related Articles
 Windows 10 Password Reset Tutorial
Can't remember Windows 10 password? Here are 3 ways to reset Windows 10 password.
 Tips to Bypass Windows 7 Login Password
Being locked of Windows computer, how to bypass the password protection easily?
 How to Remove Password from Windows 10
Get tired of inputting password each time, how to remove the password from login screen completely?
 How to Reset Windows 7 Admin Password
The administrator password not working? What is the best solution to reset password from Windows 7?
Copyright 2021 WinPWD Inc. All rights reserved.